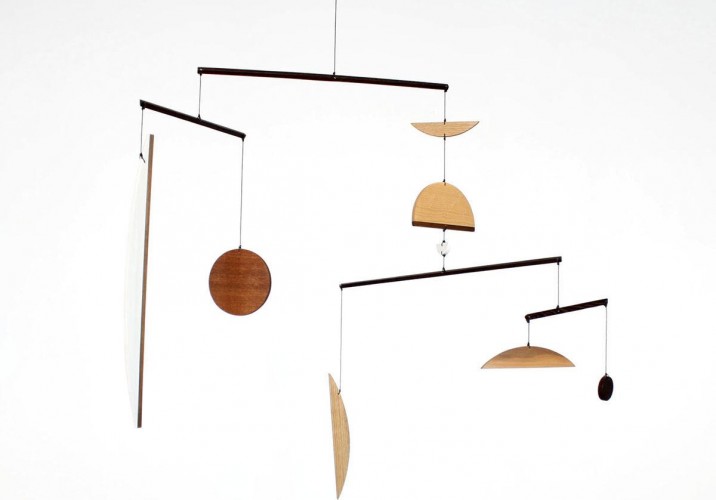
The team behind Fort Makers don’t refer to themselves as a design studio but rather an “artist collective,” and there’s a marked difference: They make functional objects, but instead of producing a stream of products with a unified aesthetic, they each work individually under the studio umbrella, experimenting with whatever interests them at any given time. In a way, it’s that same sense of structureless structure that first attracted Noah Spencer to the idea of making mobiles: You can hang pretty much anything from them, as long as you get the balance right. “Any kind of visual language can be carried into the mobile world,” says Spencer, a Paul Loebach and Uhuru Design alum who co-founded Fort Makers in 2008. While he primarily makes models hung with simple wooden shapes, he’s also been toying around lately with more expressive elements made from polymer clay (aka Sculpey), a method he graciously offered to teach Sight Unseen readers in this tutorial.
When he first began designing mobiles three years ago, Spencer had to teach himself. Born and raised in a small neighborhood outside Boulder, Colorado, called Sunshine, he grew up visiting the home and workshop of local artist and antique dealer Chris Voorhees, where a few years back he discovered a wooden fish mobile that Voorhees’s father had made in the ’70s. “That was the initial exploration point for me,” Spencer says. “I basically just copied that one and made it out of applewood.” His first few attempts “collapsed onto the floor,” and a Calder how-to book he purchased turned out to offer little help. But he kept on practicing and improvising until eventually his mobiles — sans fish at that point — were solid enough to become an official staple of the Fort Makers lineup.
The idea to bring Sculpey into the series arose from some of the studio’s collaborative art-making sessions, where they’d been using the colorful clay for jewelry experiments. Spencer would occasionally borrow pieces created during those workshops and turn them into mobiles, though Fort Makers hasn’t made any of those available for sale as of yet. When we asked the group to adapt one of their projects into a how-to story for us — others in their current repertoire including block-printed tea towels for West Elm and products for Martha Stewart and eBay’s forthcoming online shop American Made — Sculpey mobiles seemed like the perfect choice. They’re inexpensive to make, require zero design experience, and (surprisingly) don’t involve any math whatsoever. And since you can hang pretty much anything from them, there’s a wide margin of error. Check out the step-by-step directions in the slideshow at right, and if you do attempt to make your own, be sure to post the results on Instagram and tag us!
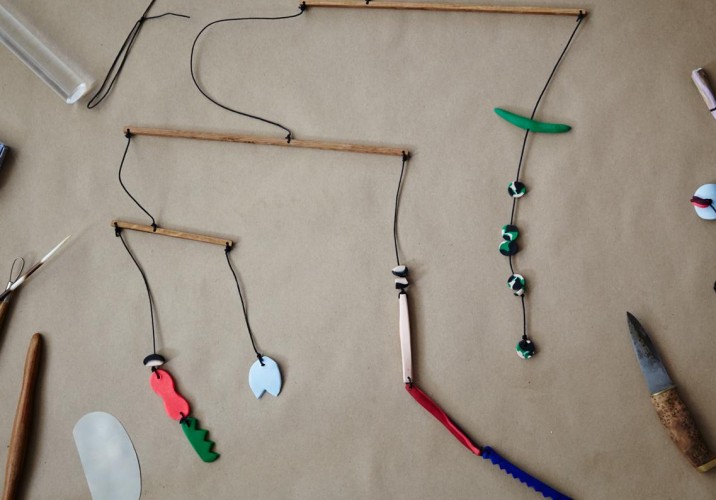
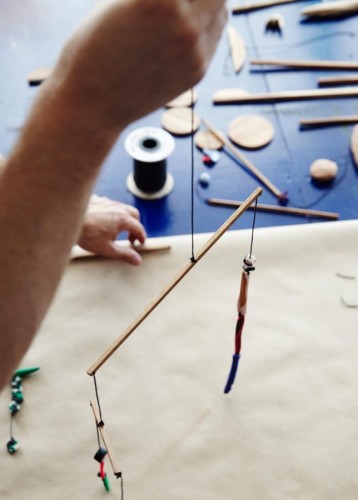
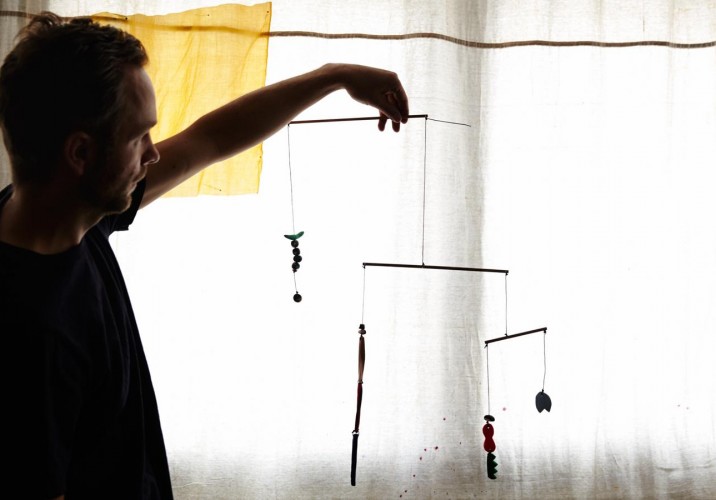
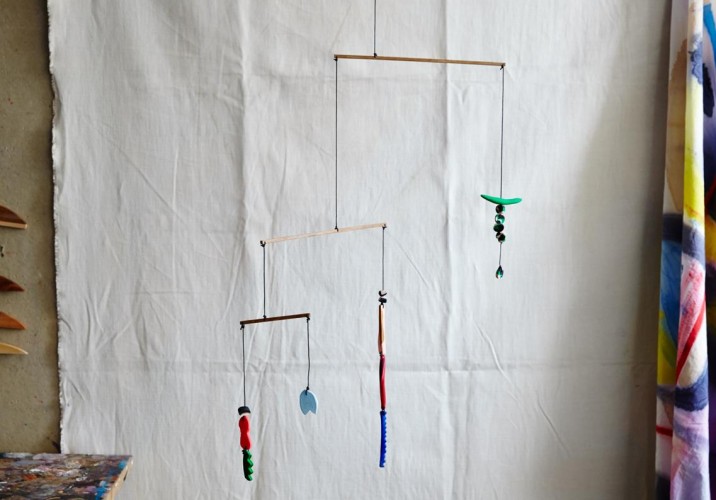
This summer, Noah Spencer of Fort Makers invited us to the group’s studio near the Brooklyn Navy Yard to learn how to construct a mobile like this one, with beads made from Sculpey modeling clay.
Spencer has been making and selling wooden mobiles of his own design, like the one pictured above, for the past 3 years. They’re sold both at Steven Alan Home and in the Fort Makers webshop.
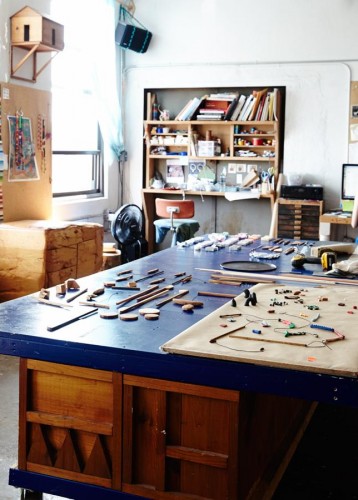
Our workspace for the morning: a modular central studio table that Fort Makers built themselves.
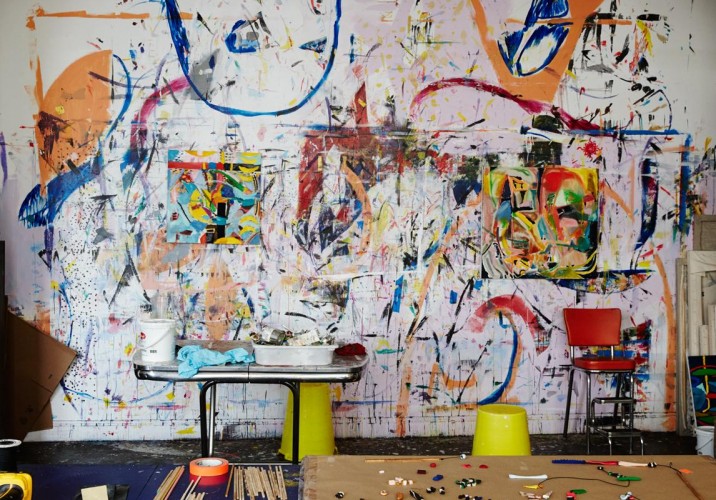
The other wall of the studio, which was too beautiful not to share: It’s covered in stray marks from the painting process of Naomi Clark, another FM founding member and Spencer’s wife.
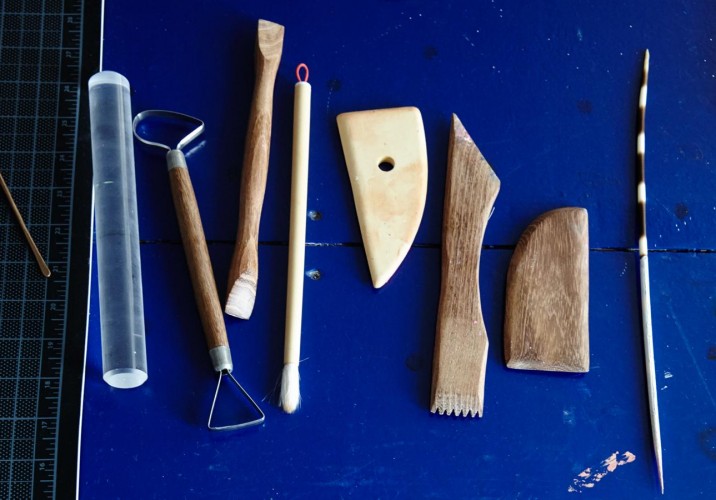
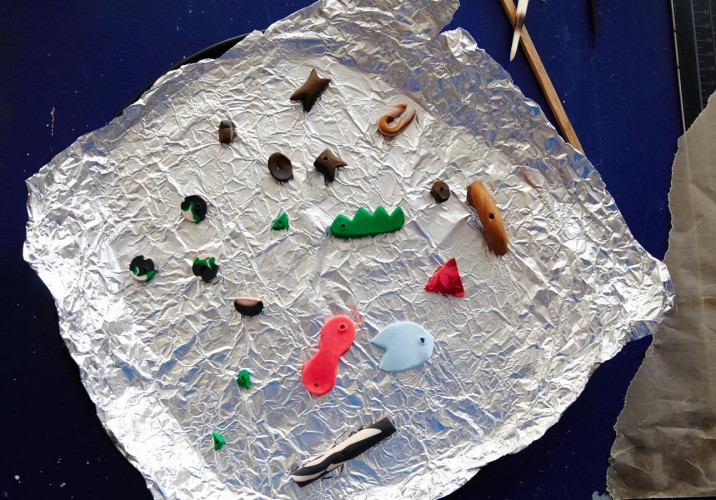
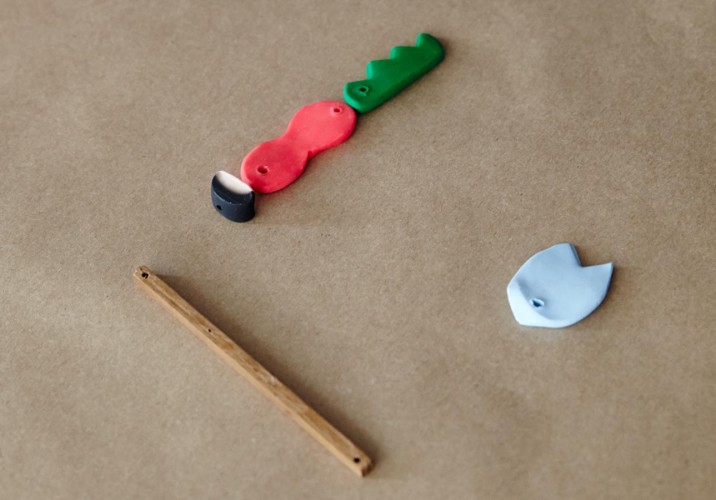
Spencer insists that you can make a Sculpey mobile with nothing more than your fingers and a butter knife. But his tool set includes a plexi cylinder for rolling out the clay; the cutting tool second to left, which is an easier way to make clean, precise shapes; and the quill at right, for piercing holes.
The first step: Using whatever tools you have at hand to make the pieces that will hang from your mobile. Spencer stresses that it doesn’t matter how they’re shaped or what size they are — you can make almost anything balance later, when you’re constructing the final mobile. Just make shapes you like.
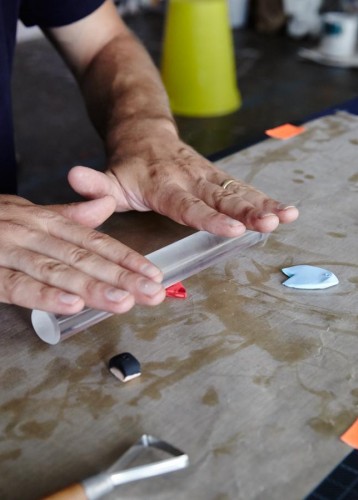
Here, Spencer cuts a zigzag into a piece of Sculpey he’s rolled out with his rolling pin. He suggests wearing latex gloves while handling the soft Sculpey, as it tends to pick up fingerprints easily.
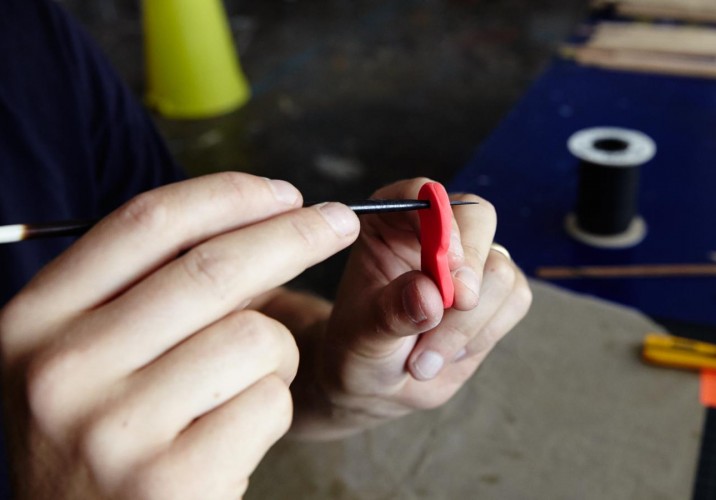
Each shape will need to be hung from your mobile somehow. If there’s no obvious way to tie a cord around it securely — so that it doesn’t move and throw off the balance of your mobile later — you’ll need to create a hole. Here, Spencer uses his quill to poke one through the top of his shape.
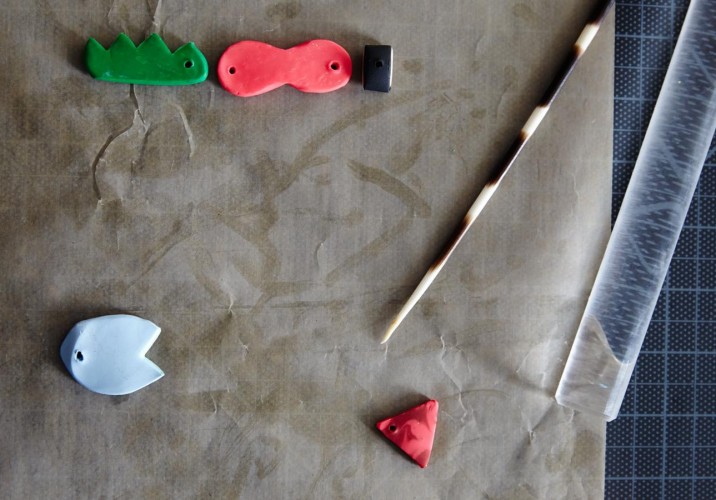
Some of Spencer’s finished pieces. Yours don’t all need to be flat, however — 3-D elements work just as well. Many of Spencer’s shapes are ones that have begun to naturally recur throughout the work of everyone in the studio: “Even though Naomi and I have very different approaches to working, we’ve passed certain language back and forth,” he says. “I used to be a landscape painter, while she’s always been an abstract painter, and over the years I’ve felt myself being influenced by her shapes and motifs.”
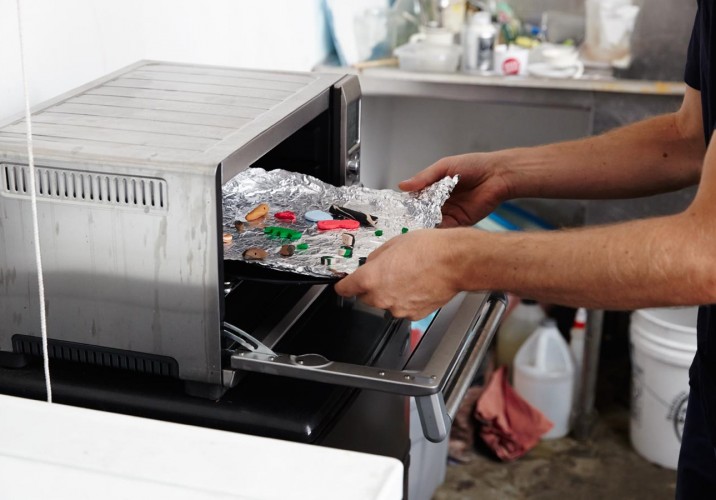
Sculpey needs to be baked to harden. Once you’ve completed all the shapes for your mobile, gently lay them out on a foil baking sheet and place them in the oven for about 20 minutes, depending on their size and thickness.
Spencer uses the studio toaster oven to do the honors.
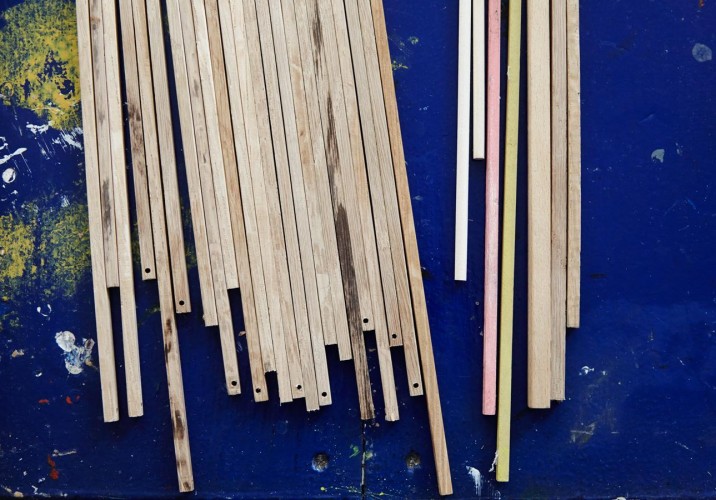
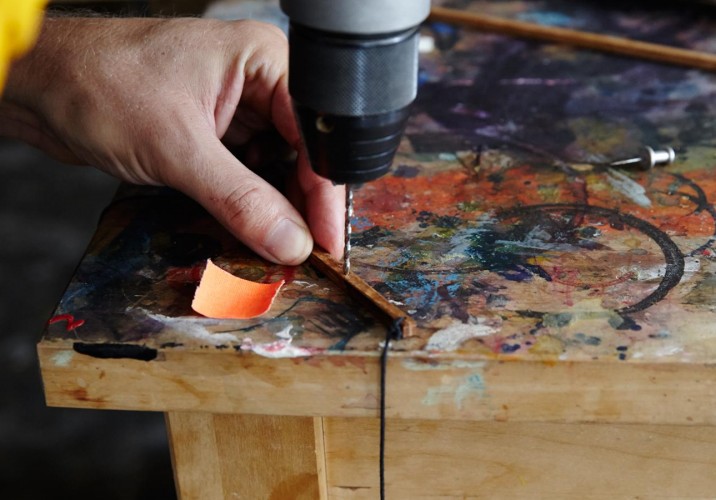
While the pieces bake, you can prep the armatures for your mobile. Spencer uses 3/16″ dowels, which he purchases from Utrecht Art Supply. He pre-cuts them to many different sizes and drills small holes into each end.
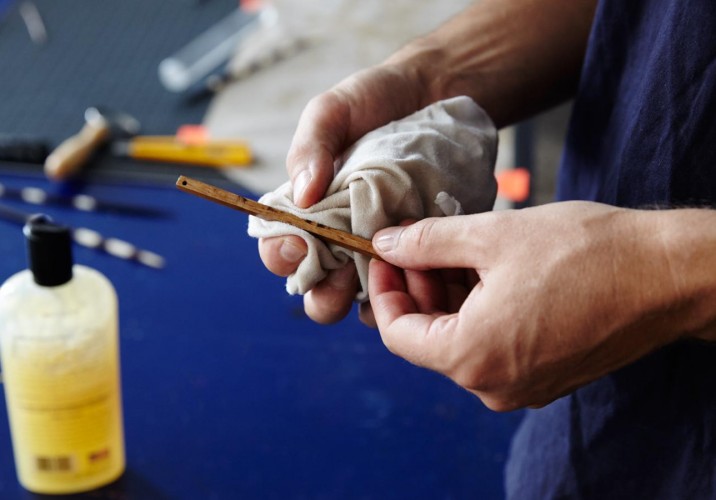
Next he applies butcher block oil to each dowel with a soft rag, though this step isn’t mandatory. “I think it protects the wood a little bit, and I like the tone, but it’s just a choice,” he says.
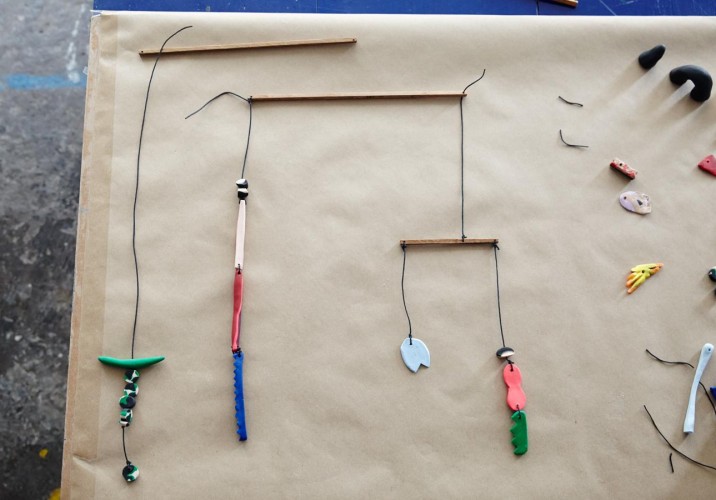
Once your Sculpey pieces are finished baking, the fun begins: It’s time to lay out your mobile design. Spencer explains that nearly any arrangement — within reason — can be balanced in the final steps of this tutorial, so don’t worry so much about which pieces go where. “It’s whatever looks good, for the most part,” he says. “And I make sure that the arms aren’t going to hit each other in its kinetic state.”
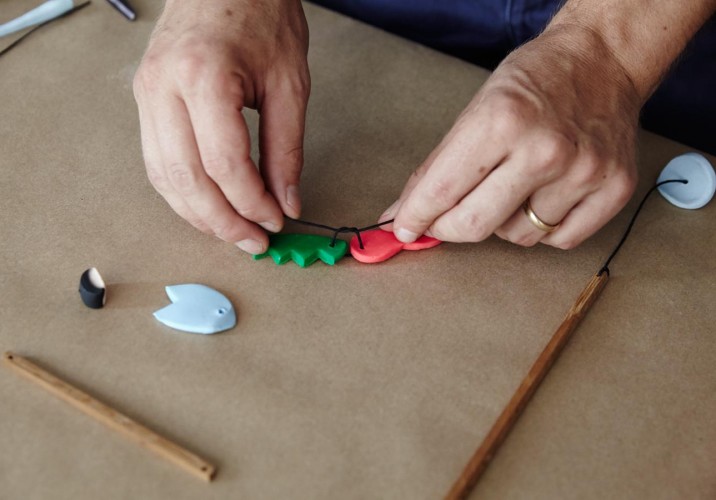
When you have a layout you like, start tying the pieces together. Spencer uses matte black waxed cord that he purchases at a beading store, but you can use anything as long as you make appropriately sized holes.
Next, tie your beads to the wooden dowel. Spend time making sure you’re happy with the length of each side, because you’ll want to finalize them, knot them, and trim the ends of the string all the way down before you’re ready to construct the next tier of the mobile, in order to ensure a fully accurate balance.
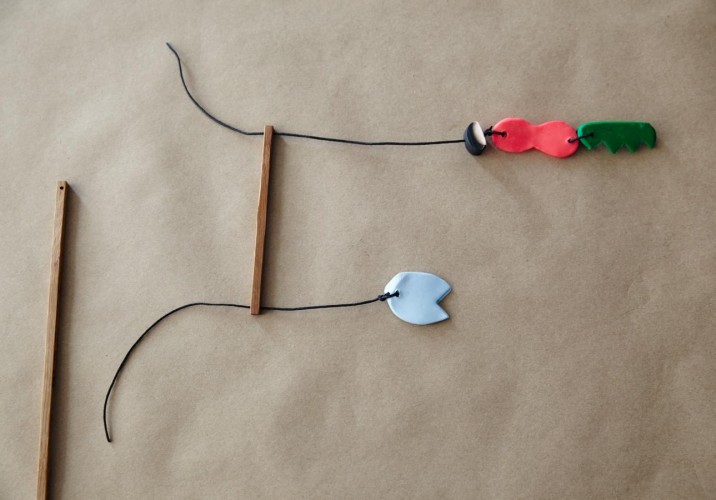
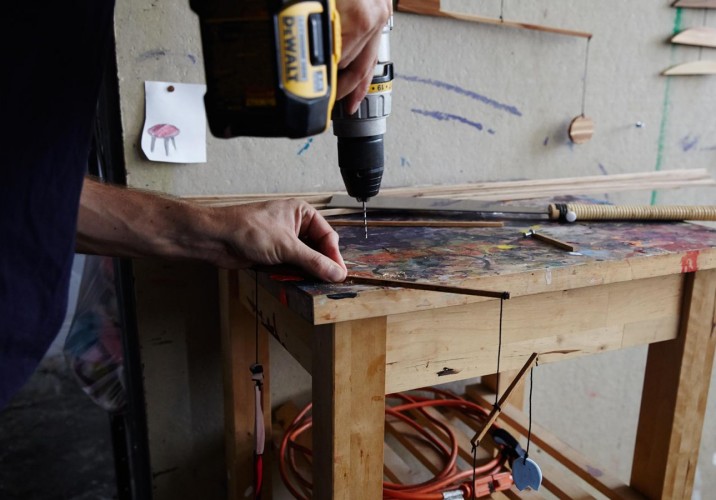
The balancing act begins: To determine where to drill a hole into the dowel, which will hang this tier from the one above it, Spencer uses a thumbtack, moving the length of the dowel along it until the arm hangs perfectly horizontal. “It’s amazing how fine the balance can be,” says Spencer. “You’re just moving it a hair in one direction or the other.”
Mark the spot where the thumbtack rested, then drill a hole into that spot. “If you don’t have a drill, you could just tie the string around the dowel at that spot, but there’s a chance it’ll slip to one side or the other,” Spencer cautions. “That’s initially how I left the first one that I made for my parents. But it ended up that the wind blew it over, because it wasn’t fastened securely through a hole.”
Using the hole you just made, tie the first tier to the dowel above it at whatever length looks best to you, then tie that tier’s beads to the other side at whatever length looks best. Trim the ends of the string down to the knots.
Repeat the thumbtack balancing method with the second tier of your mobile.
Drill a hole into the correct spot on the second tier dowel.
If you tie a string from the hole and find that, despite your best efforts with the thumbtack, it still isn’t hanging 100% straight, try altering the shape of the knot slightly, or shifting the way it’s sitting on the dowel.
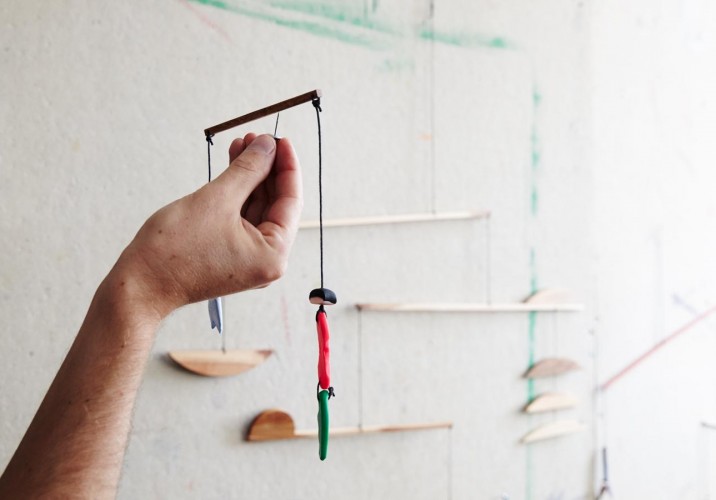
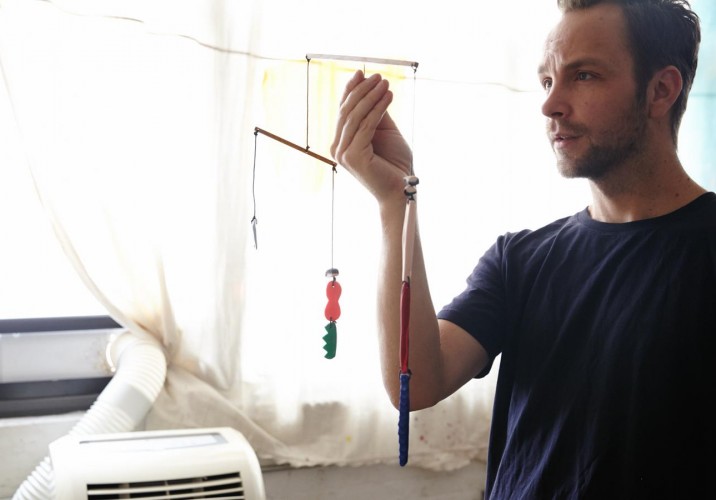
Spencer holding up his near-finished mobile. To complete it, just repeat the thumbtack balancing method and hole-drilling one more time on the top tier, to add the cord you’ll hang it from.
If you don’t have the fortitude to build your own Sculpey mobile, of course, you can always purchase one of Fort Makers’ existing wooden mobile designs in the studio’s online shop.
At the London Design Festival in 2009, Apartamento magazine collaborated with local furniture wunderkind Max Lamb on a show called “The Everyday Life Collector.” The title referred to Lamb’s father, Richard, who had spent more than 15 years surrounding himself with British studio pottery, of which 400 examples were on view. But while age might have given him a leg up in the volume department, it turned out that the elder Lamb wasn’t the only one with the collecting bug: Max, too, admitted to joining his dad at flea markets from time to time and almost never coming home empty-handed. So when we had the idea to start a new column called Inventory — for which we’d ask subjects to photograph a group of objects they found meaningful — we turned to Max first, and he didn’t disappoint. He sent us 10 images of the collections on display in his live-work studio in London, then gave us a personal tour.
Designers around the world owe Johanna Agerman Ross a drink, or perhaps even a hug: Her new project, the biannual magazine Disegno, is devoted to letting their work breathe. “I always found it frustrating working for a monthly, because I couldn’t give a subject enough time or space to make it worthwhile,” says the former Icon editor. “For a project that took 10 or 15 years to make, it felt bizarre to represent it in one image, or four pages.” Founded by her and produced with the help of creative director Daren Ellis, Disegno takes some of the visual tropes of fashion magazines — long pictorial features, single-photo spreads, conceptual photography — and marries them with the format of a textbook* and the investigative-reporting ambitions of The New Yorker. The story about Ronan and Erwan Bouroullec which we’ve excerpted here, for example, fills 22 pages of the new issue and runs to nearly 3,000 words; it’s accompanied by images captured over two full days the photographer spent with the brothers, one in their studio and one at the Centre Pompidou-Metz, where they were installing their latest retrospective, “Bivouac.” And articles on Martin Szekely, Azzedine Alaïa, and Issey Miyake’s Yoshiyuki Miyamae are set either over lunch, or in the subject’s living room. The focus, says Agerman Ross, is on proper storytelling. “The people behind the project, the process of making something, even the process of the writer finding out about the story — that’s all part of it,” she says. “It’s the new journalism.” Obviously, we couldn’t agree more.
“Another Cats Show” may have started as a one-liner, but that doesn’t mean it fails to land the joke. The exhibition, which closed this week at the Los Angeles gallery 356 Mission, included feline-themed pieces from 301 artists and proved that what they say about die-hard cat lovers is pretty much true: They may be crazy, but they also totally mean it. “People assume cats will be funny,” says Ooga Booga founder Wendy Yao, a partner in the space. “It is casual and inclusive, and gives artists a chance to do something not quite as monumental.”